Tuesday, 26 August 2014

Final Assesment for MDU105 Assest Production


This is my final assessment work for MDU105 class, I've spend 5 weeks researching and modelling the vehicles that I love and that is the Lamborghini. The most difficult thing to do was to create a model that have alot of polygons and bump and also putting UV mapping on to it , I've spent approximate 12 hours redoing and fixing them. There are time where it never going the way I wanted it. But as I process slowly, I've finally made it to the conclusion. I decided to do my own way of understanding how to model a vehicles, learning from the lecture tips and translate into my own understanding. I wanted to challenged myself by modelling the hardest ride that ever invented. After 5 weeks of hard work getting the exact model done, I'm finally proud and happy with what I've got, after all the frustration and hard working that I put in. Despite with the UV mapping and texture, it was the most difficult thing I've ever attempted in 3D. I sure have learn t alot throughout the lessons. After modelling them I import it onto After Effects and got it render. Here it is my LAMBORGHINI!!! "Ride or Die"
  1. A rendered still image of the final model presentation at a resolution of 1920x1080.
  2. An mp4 (H.264 compression) video of the animated model (720P resolution).
  3. Working files (3d scene file and textures).
  4. A link to their online blog.

Friday, 25 July 2014

Video Editing


In After Effects, You can do variety of ways, I like this process very much because it gives me time to do fun stuff, by adding my company name and sounds effects. After putting your work on to After Effects, You then need to edit, the video clips frame by frame. Or mostly preferably "Image Sequences" This is the most simple and easiest way to do, So you don't have to waste time rendering big files.

When the process is all done, you need to go to Add Render queue and makes the setting to "H.264" or go to best setting for full resolutions. Then You're done! When you are done, make sure that it is all ready to play. Once you are happy with it. You are ready to go. I find it very exhausting to figure a way to Put my image sequences into "After Effects" overall I'm happy the way it turns out.

Composition


When putting them onto After Effects, The next step is to make sure that setting are exactly the same as the clips. It shouldn't stretch out. Instead I drag it on to the composition and makes it 24 frame per second.

Rendering


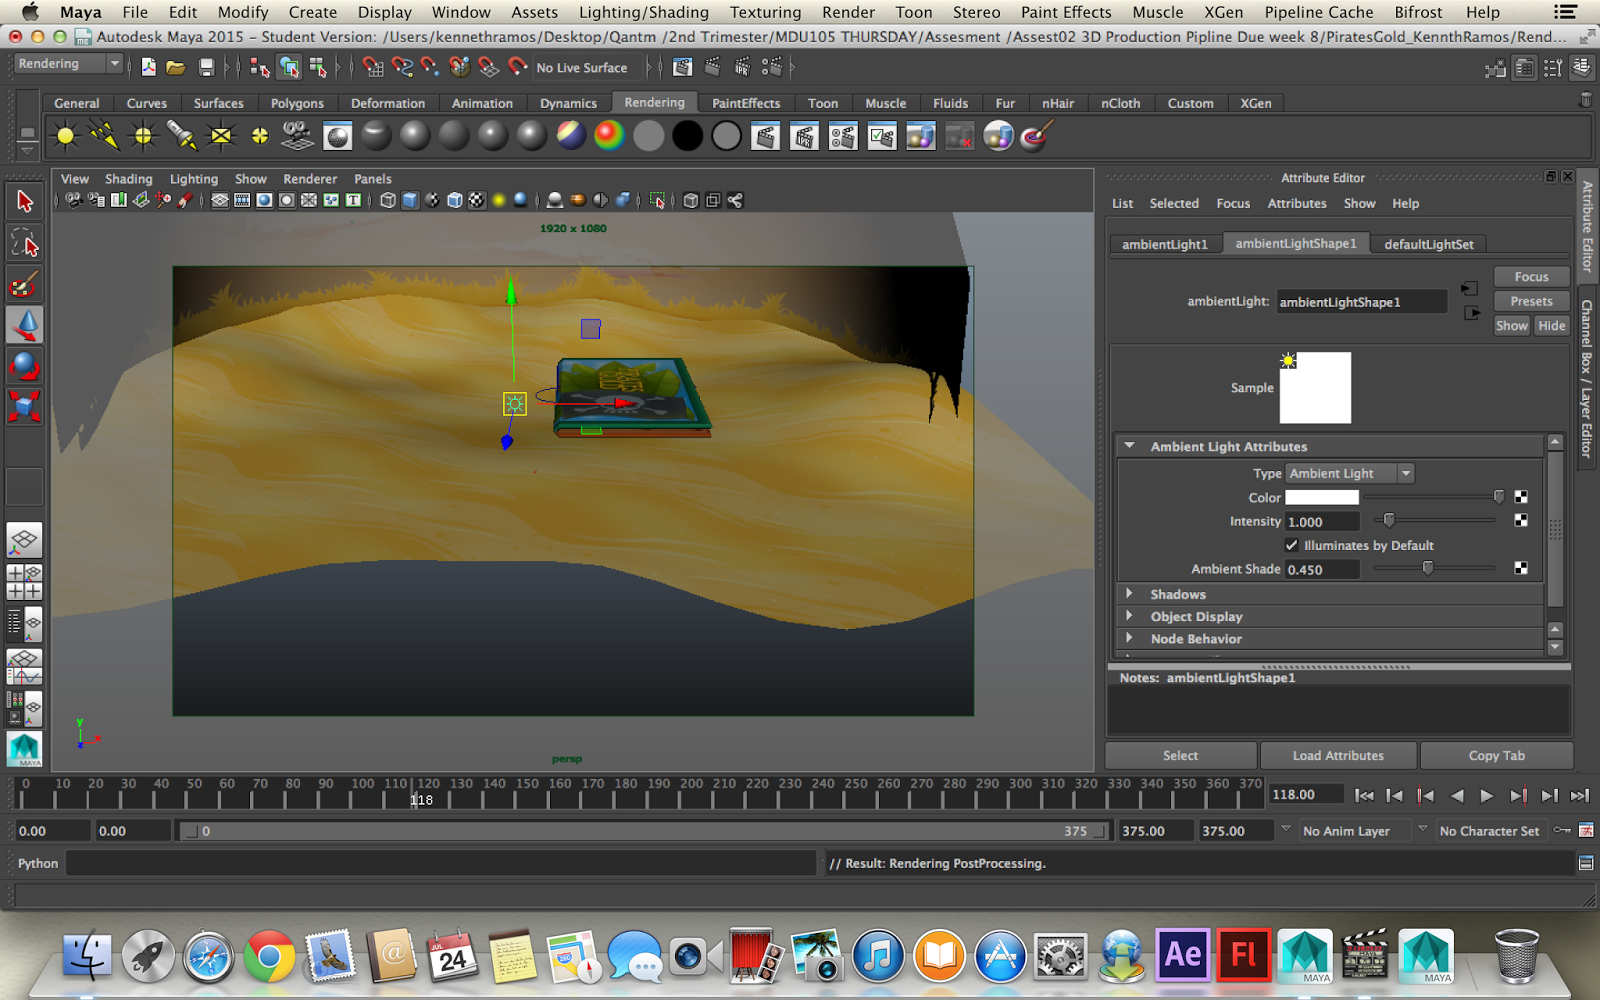
After the process is all done, The next part was to make sure you render it properly, You go to Render sitting and making sure that all of the setting are all right, before continuing it. The most important thing to keep in mind is "Enable Defaults Lights" without checking them. It will affects the background and most of the time, it will turn black. I find it irritating to figure it out a way to get rid of the black frame, and realising that I didn't click the "Enable tap"

You then change to Rendering Tab after you done "Animations" then go to "Render" then select Batch Render box to change the setting, after it is all set up. You are ready to go on the final process. Click Batch Render and Click Batch Render again. Just make sure that you set it to PNG.

Lighting


Lighting an objects on Maya is pretty much straight forward, after creating a lights, select any lights options. I chose the directional lights and ambient lights, because it gives more looks on to it. A

After selecting the light, you click on 3 balls next to the checker (Gold, Blue, Brown)
Click the lights then go to "Attribution" Editor tab. then click shadows, go to Depth Map Shadow Attributes and click the check box.

Put the resolution up if pixilated, Go to Render Setting to change anything that needed. Click Render the image then you're done. That's the basic Lighting and rendering.

There are other lighting tools that you can use, but it mostly good for city landscape, Day and Night.
I prefer using this for that. To do that I'd go to Render Setting, making sure it set to "Mental Ray" choose indirect lighting.

Where it says "Environment" You have two option so click physical sun and sky for example.
Maya automatically do it, for you, close the render. Option if the light isn't strong enough, you can "multiplier" to "two" the Haze will give a fog light appearance. You change Ground Colour. You can also change Night colour to Blue. Also create "Directional Light" as a sun, have the camera selected, go to view-camera selected. Go then to attribute editor, you should now see "Environmental Shader and Lens Shader" it shows that it controlling the camera.

Scene Assembly


After assembly all of the objects work and images, It is time to animate all of them including the board. The process is still the same but animating all of the objects and camera, takes a lot of work. I duplicate multiple objects and animate them in different key frames. After you get the setting right and understand what needs to be done, I think the most difficult things was to actually, animate the objects coming from under the board because it wasn't easy to raise up, when needed, I also find it difficult to animate multiple objects especially the coins up even the crabs. So I think the easiest way for me to do is to Animate the moving objects the way I think it should be done, everyone ways are different.

In my knowledge and understanding I think that Crab should be together, rather than having just an arm but not the body to animate.

Animations


The Basic of animating a camera was the first thing to do was to create "a camera" There a variety of ways to create a camera. I find my process very easy to understand when animating a camera or an objects.

The first thing you need to do, is to select an objects than drag the number bar anywhere then click the "F" key. The whole attributes should now turn red. Otherwise right click and select "Key" it should automatically show up and ready to animate. In the Animations it should have red and now drag the timeline and click "F" key again.

After the process has done, you then need to PlayBlast.

Here is the setting that I used to animate using "PlayBlast Options" 

Rigging


Rigging to Rig an objects, you have to select a lid of the treasure chest and select "E" key to Rotate and it should rotate, the most important thing to remember before rotating was to make sure that you have them in separate layers. If you don't select them and create a Layers it will not go very well. So it's important to Make a "new layer" before doing the process.

Texturing


The process for this was to now add texture on to it,

Go to "Window"
Then go to "Render Editor" and finally click "Hybershades"
Click "Blinn" and select "File"
Click the file with the middle mouse button then drag to the Blinn then click colour.
Double click the file, right click to find an image on the "image name folder" After you select the image you then select and object then right click to "Assign Existing Material" then select "Blinn" then let go.
To fix the UV go to "create UV" and then click "Automatic Mapping" then click "Assign Existing Material" again. then right click to UV.
You then select UV to edit.
Use tools like a scissors which is like the top left hand corner for separate.
Now to fix any white stuff that may left showing, select objects then click UV.
The finally select where the line (while) is showing. then move up or down or anywhere you wanted to be.

There are other options which is called "The Bump"
To do that that click an object, go to the "Blinn" tab.
Where it says "Bump Mapping" we are going to put the same image as the same process before onto it.
Now once the image is done, go to where it says "High Quality" golden globe, and then you will get the nice bump texture image.

Tips to remember:
Always use "6" tools on the left to adjust UV. and for Unwrapping. This process is pretty straight forward and I like it and very easy to use, not too complex to understand how to put on a texture.

The first things was I went to Photoshops and using the Wacom Pro tablets, I was able to smooth out the UV Snapshot. I was also able to make a nice wood texture around it.

UV Mapping


Unwrapping

The First thing to do was to unwrap before texturing on to it,

The process started of as in UV Editor you will see the proportion of the objects. Select the object, than right click and select existing material then click "6" for shaded and textured mode. You then go to "Automatic mapping" to sew, right click and choose "edges" than click one of the edges. Select polygons next to subdivide and select "Move and Sew UV edges.

Press "G" key for repeat last action it make an odd shapes. Select the edges which had one space (square) then click Sew UV edges in the polygons edges. Now select the second square on the top. Then click "E" to rotate.
Keep repeating until you get what you wanted.  This is the most challenging process, I've ever acquired. It takes a while to get used to it.

3D Modelling


In the first week, we had to create an objects. We learn the basics of Maya, I honestly find it very complex. So it we created a shapes of polygons, square and sphere and other shapes. There a lot of model to choose from creating a chest, The most difficult part when copying the chest, it dragging the bottom lid up, the proportion wasn't great and so it frustrated for me, to make it looks the same as the others. I had understand a way, So I used the edge tools. I've spend using the objects tools and no wonder it wouldn't go to the way you wanted to be.

Thursday, 3 July 2014

Week 04 how various textures and shaders affect the way a surface appears in 3D.

Introduction
The different textures and shaders affects the way a surface appears in 3D, it really depends on what you are after but like  
“In many 3D applications, when a model is created, by default that model will be a single color - usually gray. A real world analog to this would be sculpting in clay. When a clay sculpture is created the color of the sculpture is the color of the clay. It is only after the artist paints or glazes the sculpture that it takes on a unique color. The same is true when modeling in 3D; the 3D “clay” is a single color determined by the modelling application. Instead of painting directly on to the model in DAZ Studio we apply “Textures” or “Image Maps” to give the model color.” (“III - Textures, Surfaces and Materials”).
“A “Surface” is a specific subsection of the 3D model, a group of specific polygons, that share common properties to describe what the surface of the model looks like. When an artist models an object, he or she will assign specific sections of the model to a named surface. When they are finished, every polygon of the model will be assigned to one surface or another. A simple model may have only one surface, while a complex model can have multiple surfaces. The Genesis figure, for example, has 26 surfaces.” (“III - Textures, Surfaces and Materials”).
It helps with my UV mapping and designing, an objects within the 3D models.
“A shader (also called a shading-network or surface material) is a set of instructions attached to a 3D model, which tells a render engine how the model's surface should interact with light. Without a shader a 3D model would actually be invisible, existing only as a collection of raw data points. This is because the software's render engine would have no programmed instructions for displaying it on the screen—in a way, a shader is what gives a 3d model its visual appearance.” (Slick).
This helps me explain on what I need to know, when it comes to render engine.
In the reality is, we have a lot of basic fundamentals on surfaces to choose from as “Just as there are hundreds of different surface types that appear in the real world (metal, plastic, stone, wood, ceramic, etc.), dozens of different shaders are typically needed to accurately surface an entire 3D scene. A model with a dull, non-reflective surface like cloth or canvas requires an entirely different shader type than a glossier surface like plastic or polished wood.” (Slick).
Surfaces have alot of variety to choose from when putting onto a different surfaces.
“A great deal of time can be dedicated to each frame, so every polygonal object can have its own dedicated shader network. For example, an automobile model might have separate surface materials for the glass of the windshield and headlights, the painted body of the vehicle,”
“On the technical side of things, shaders are built on high-level shader languages like Direct3D or OpenGL. There are three different types of high-level shaders: vertex shaders, pixel shaders, and geometry shaders—if that sounds complicated, it's because it is.”
Here is some of the shader types that comes standard in most Maya software standards in software like ZBrush, Maya, 3dMax
“Lambert: The most “diffuse” of all the common shader types, meaning that light is evenly scattered about the surface rather than being directly reflected. A lambertine surface has the same apparent brightness regardless of the angle from which it is viewed”
“Blinn/Phong: Almost visually identical to one another, blinn or phong shaders are typically used for reflective surfaces like metal or ceramic.”
it is very similar to others like Lambert, not much of a difference there when I tested it. Only the lighting that affects it.
“Anisotropic: An anisotropic shader also shows a distinct highlight, but in this case the reflection appears as an elongated ellipse.”
“These generic shader types are simply a set of base parameters that can be fully customized to meet specific needs. It's very rare that a generic shader will perfectly satisfy the artist's aesthetic goals without some sort of modification. A small sample of modifiable shader parameters includes: Diffuse Color Opacity Reflectivity Specularity Incandescence Translucence Ambient Color”
This will helps me when modeling an objects and have a better understanding into it.
“Surfacing is an extensive subject, and makes up an entire segment of the computer graphics production pipeline. There are artists who have spent their entire careers developing textures, surface maps, and shaders for the characters, props, and 3D environments you see in films and games.”
Interesting enough, we need to learn the basic, like how objects is shaded, textures. Which can be translated into attributes on shading networks nodes in Maya. And try to achieve exactly how we can make it successful. When the surfaces on the objects becomes shiner, it begins to explain the highlights and the reflections. When you show the hot spots where the light works are reflected. When the lights are reflecting the objects it reproduce light bounced from surrounding objects.
Here are some of the examples that I’ve collected in online on how each, shades/textures are differents.


 The treasure chest that created I used Lambert for the treasure


Bibliography

(n.d.). Iii - textures, surfaces and materials. Retrieved from
Slick, J. (n.d.). Surfacing 101 - shading networks and surface materials. Retrieved from
http://docs.unity3d.com/Manual/SL-SurfaceShaderExamples.html

Monday, 23 June 2014

week 03: 3D Graphics and Ptek


  • Describe some highlights and pioneers of the history of 3D Graphics with visual examples. 

One of the most famous computer scientist, in the world is Edwin Earl “Ed” Catmull. The current president and co-founder of the Walt Disney Animation Studios, Disney Toon Studios and Pixar Animations Studios. Edwin had a big influence to many developments in computer graphics that you will hear of in the creative industries. Edwin biggest gift in the industry is the creation of "mapping texture” he had also developed anti-aliasing algorithms, the refining of sub-division modelling, and blazed the trail in working on the concept of Z-buffering. 


Steve Slug Russell is another great and famous for creating Spacewar in one of the earliest video games. He also invented the continuation on which is an abstract representation of the control state of a computer program. He had also work with technical support for Bill Gates and Paul Allen as they learned how to program computers, which later became there success because of Steve. ultimately it too the team of MIT about 200 man-hours to write the first version of Spacewar. “He wrote Spacewar on a PDP-1, an early DEC (Digital Equipment Corporation) interactive mini computer on which used a cathode-ray tube type display and keyboards input". A computer game on which Steve created was the last thing that DEC (Digital Equipment Corporation) expected who later provided the game as a diagnostic program for their customer.

Bibliography:

  •  Discuss the meaning and implications of the term “democratisation” in relation to the 3D graphics industry. 

Democratisation in relation to technology refers to the increasing availability of complex technology and shrinking price of that difficult technology, which helps improvement in the industry and the users have become related with more cheap products. New technology, software and services will either limit or expand what the industry can do. regular consumers is limited by this system design, there are a lot of inexpensive to buy than most powerful computer now than it was many years ago. It may be expensive but it can only limit what every individual can do. Online services have been a little bit more pricey, still limited but less. fan could animate a scene, finish a couple of test renders, then send their files to the other department. This allows open up in the workplace for other projects, I don’t think it is a perfect option to do, but it goes to show that new technology are generally moving quickly and are more available to the community every year. 

Bibliography:

  • Emerging technologies – What is Ptex and how do you think it will affect asset creation now and into the future? 
1) Definitions of Ptex: 


The definitions of Ptex comes from the Walt Disney Animations Studios, it is a mapping system for texturing, it was made for production-quality rendering. The file format can store hundred of thousands of texture images very professionally fit all into one file. Ptex can also apply separate texture to every face of a polygon mesh. 

How Does it affects assets creation in the present and future? 
In the beginning with Disney Animations, and Pixar, Ptex has been combine into the movie industry pipeline. it a lot more well-organised than UV when it comes to texturing, but it not always the industry traditional, Ptex can also poe a problem when it comes to video games side of the creative industries because games have to be well rendered in real-time. In animated films Ptex is mainly what used to animate because they have a ver good high quality texturing for pre-rendering and under limited deadlines. It is look like it is the future of Ptex, but there are a lot of problems that need to be solved. and it could become more widely effected. 

2) Bibiliography: 

02 3D modelling research and development


- Discuss the current trends in 3D modelling for games and film.

- Describe and show examples of a typical 3d modelling pipeline for a current generation game asset.

There a lot to learn about the industry that I will be entering at the end of my degree course. This week I was tasked to looks at the current trends in 3D modelling for games and films. I’ve found some examples complex on character models for games and films, such as a realistic movements with full details and high quality standard, including realistic environmental designs in both games and films. There are a lot of obvious games and films today, like Disney Frozen, Tangled, Toy Story, Dinosaurs, Wreck it Ralph and games like Final Fantasy, NBA 2k14 (the best examples on development and showing great advertise and videos in the last 14 years) The Last One of Us, Uncharted Drake and Assassin Creeds. These games show excellent examples on development works and it put into full high quality details. In films like Avatar and How to Train You Dragons are also a great examples on developing 

Recently I went to Burbank  to meet up with the Animators after my first trimester course for my one week work experience  and I got to say, the quality and the projects in the industries is a lot complex than I thought. During the time there I’ve the honoured to sit down and work with the Production Development and Characters TD currently they were in the toward of finishing the project on the new "Big Hero 6" overall it’s describe as one of the best development work I’ve seen behind the scene. Disney have a meeting with the directors for developing before transfer into 3D, and it’s exact examples on the recent success movies and other movies since Toy Story 3 “Disney Frozen”

here is the two videos of the success on Disney Frozen, same software that I'm using at Qantm Melbourne 
https://www.youtube.com/watch?v=XiAra6zlQ-A 

https://www.youtube.com/watch?v=-RiyeoQboyI

https://www.youtube.com/watch?v=iiomwhsCN6s 
(the conference meeting) 

Here is the informations that I got it from different between 3D games and films. 
http://animation.about.com/od/videogameanimation/a/gamesvsmovies.htm

http://www.pstcenturia.com/how-3d-game-animation-differs-from-film-animation/

“creating animations for video games is much different from creating animations for movies. The big differences is that a movie is meant simply to be viewed, while the purpose of a video game is to interact with the characters or an objects, for this reason, animating for video games can be much more difficult than animation for video games; this is because is only a broad generalisation of the differences between the two genres” 

the development team that work on the project decided the role of a 3D, the quality is high standard that they all have they’re own responsibility which is usually to create models an efficient way and which is more suitable for films.


The different is that in games you interact whilst in film “three-dimensional animation is used in films, television, and video or computer games to provide the viewer with a rich and realistic view of a fantasy world"

In animating video game involves "different features of the design process than you need for a movie animations. What’s important to remember is that film animation is designed to be submissively viewed, while 3D animation for a game will be mostly interactive. In animations that used in video games are more complex than in films. 


bibliography:

"Rio 2 - Reel Life With Jane." Reel Life With Jane. N.p., n.d. Web. 23 June 2014. 

"Frozen Behind the Scenes." Computer Graphics Digital Art Community for Artist Job Tutorial Art Concept Art Portfolio. N.p., n.d. Web. 23 June 2014.

"What Uncharted 4's Million Polygon Characters Will Look like - Page 2 of 2 | PS4 News | Official PlayStation Magazine." Official PlayStation Magazine RSS. N.p., n.d. Web. 23 June 2014.

Wednesday, 11 June 2014

Week 01

- Describe and show examples of the typical stages in a 3D Production
pipeline.

There are 11 development stages that are use in creating 3D Production pipeline.

1. Pre-production
2. Modelling
3. UV Mapping4. Texturing
5. Rigging
6. Animation
7. Scene Assembly
8. Lighting
9. Rendering
10.Compositing
11.Editing